Prefer to read? Everything in the video is covered below — plus a few things I didn’t get to on Scuba diving ascents and descents.
Introduction into Scuba diving ascents and descents
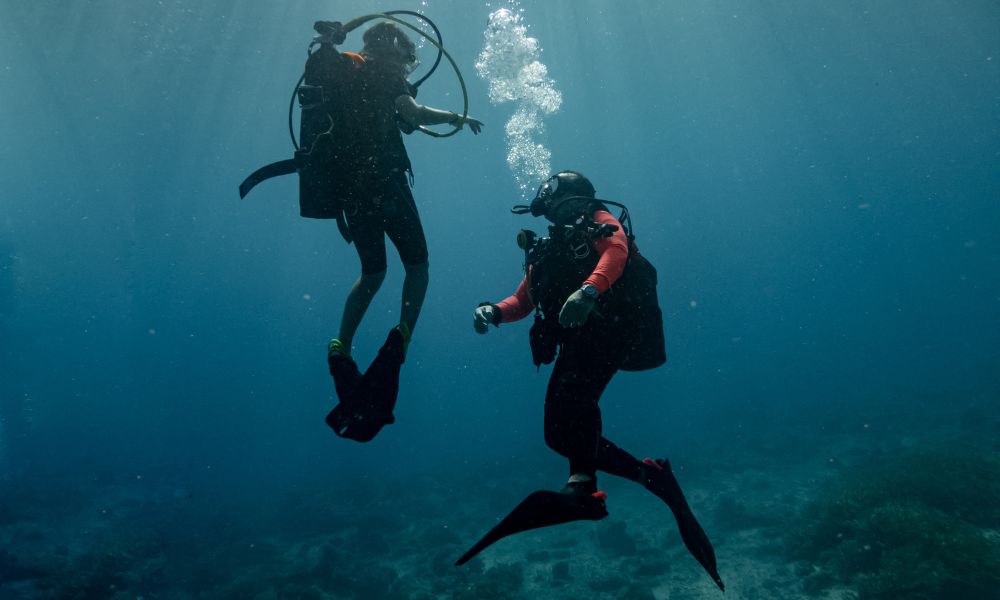
Getting in and out of the water is the bookend of every dive. Done well, you barely notice it. Done poorly, it sets the tone for everything that follows — or worse, it ends the dive before it starts.
After 12 years and well over 10,000 dives, I’ve seen every version of this. Divers who crash into the reef on descent. Divers who shoot past their safety stop and pop to the surface like a cork. Divers who can’t get down at all. And divers who make it look effortless — because they’ve internalised the steps until they’re automatic.
This lesson is about getting you into that last group.
Why Scuba Diving Ascents And Descents Matter More Than You Think
Most dive injuries don’t happen at depth. They happen on the way down and on the way up.
An uncontrolled descent means you can’t equalise properly, which risks ear barotrauma — damage that can sideline you for weeks or, in serious cases, permanently.
It means you might drop onto coral, destroying a reef system that took decades to grow. It means you can overshoot your planned depth and eat into your no-decompression limits before the dive has even started.
An uncontrolled ascent is even worse. As you rise, nitrogen that dissolved into your tissues at depth starts coming out. Do it slowly, your body handles it. Do it too fast, and those nitrogen bubbles form in your bloodstream and tissues — that’s decompression sickness (DCS), and it’s not something you want to experience.
This really isn’t to scare you, and even though diving inside the limits are generally super safe it is good to understand the physics.
Know the process, follow the steps of Scuba diving ascents and descents, and always dive within your comfort levels.
The Controlled Descent — Step by Step
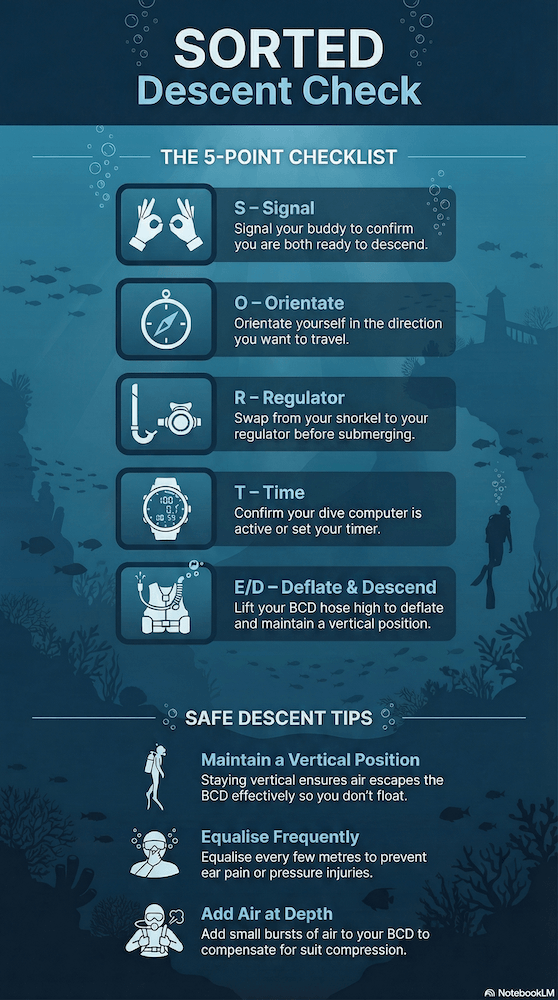
Before You Go Down: The Five-Point Check
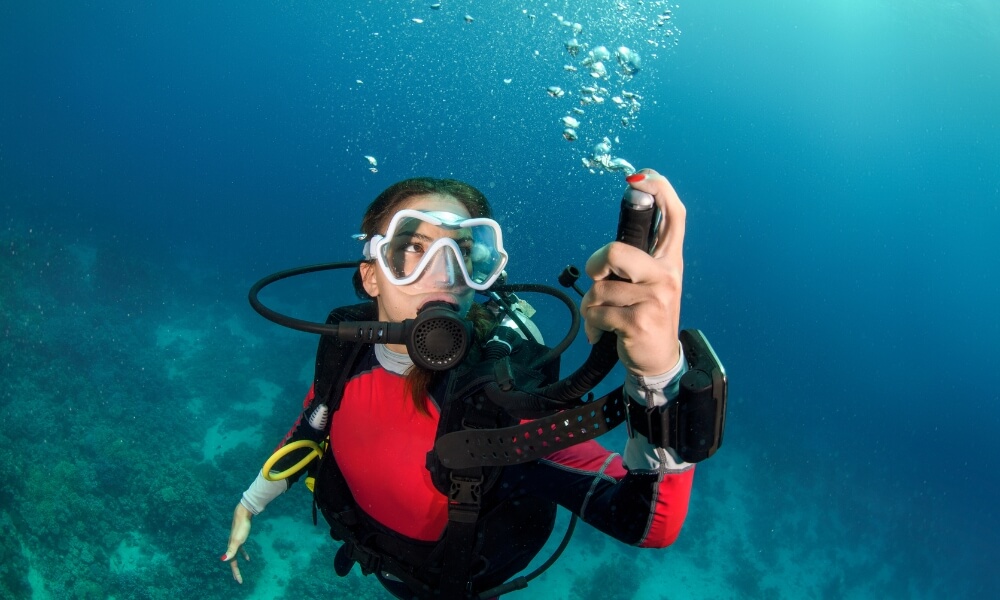
You’ve entered the water — whether that’s a backwards roll, a giant stride, or a shore entry. You’re on the surface. Before you go anywhere, run through your five-point buddy check: SORTED
- Signal — confirm with your buddy that you’re both ready to descend
- Orientate — look in the direction you’re heading; know where you’re going before go down and line yourself up with the rest of the group/guide.
- Regulator — swap from snorkel to regulator.
- Time/Computer — start your dive computer or timer now, not once you’re at depth
- Deflate/Descend — hold your BCD inflator hose up high, dump the air and start to equalize.
At this point, keep yourself vertical. Fins pointing down, body upright. If you go horizontal at the surface, the air trapped in your BCD won’t drain properly and you’ll fight the surface for longer than you need to.
Breathe out. Let yourself sink.
Most divers underestimate the descent, but it is one of the most important skills to master, as it sets you up for the rest of the dive. Failing to do so, in some cases can lead to underwater panic.
If you want to learn more about how to prevent an underwater panic, check out this article: Scuba Diving Panic: What to Do, How to Help AND how to Prevent It!
The Descent Itself
Don’t just fall to the bottom. Descend in stages — it gives you time to equalise properly and stay aware of where you are.
3-6 metres: Stop. Check your body position and buoyancy. Look at your buddy. Equalise. Clear the pressure in your mask. Make sure you’re still oriented in the right direction. Only then continue.
Another 3-6 metres: Same process. Stop, check, equalise, reorient, continue.
This rhythm isn’t slow — it’s controlled. There’s a difference. You’re not pausing because you have to; you’re pausing because it makes everything easier from here on.
I follow this exact technique and I have been able to keep up with people swimming themselves silly to get down.
Difference? They are out of breath – I am in control and calm.
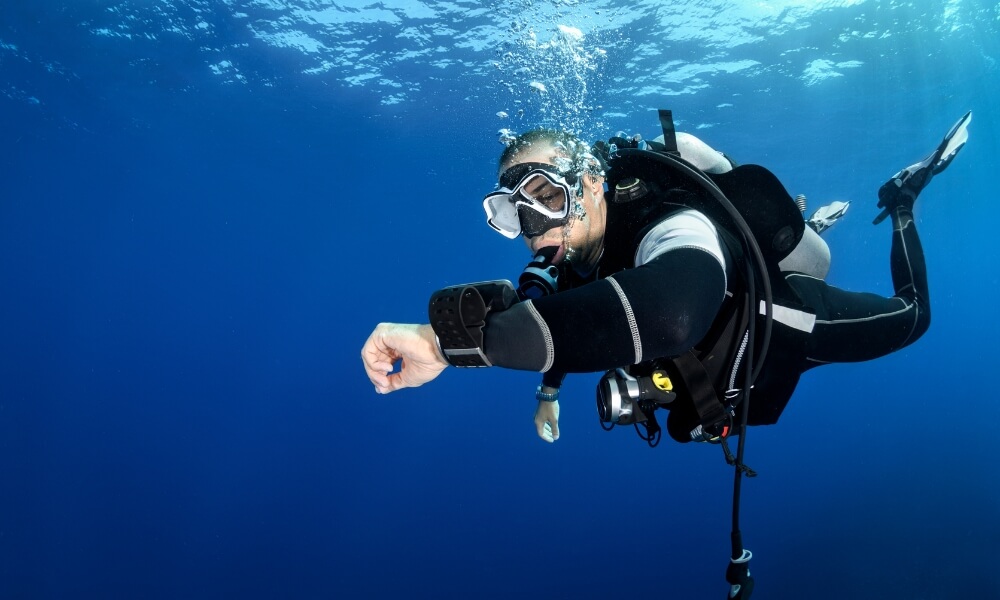
The “Skydive Position” on Descent
I mention this in the video and it’s worth expanding. Once you’ve transitioned from vertical to horizontal around 5–8 metres, you’re in a much better position to manage the rest of the descent.
You can see your dive computer without contorting. You can watch your buddy naturally. You can fin in the direction of the dive site while still going down.
It also means that when you arrive at the bottom, you’re already in the trim position you’ll use for the dive. You don’t have to reset — you’re already there.
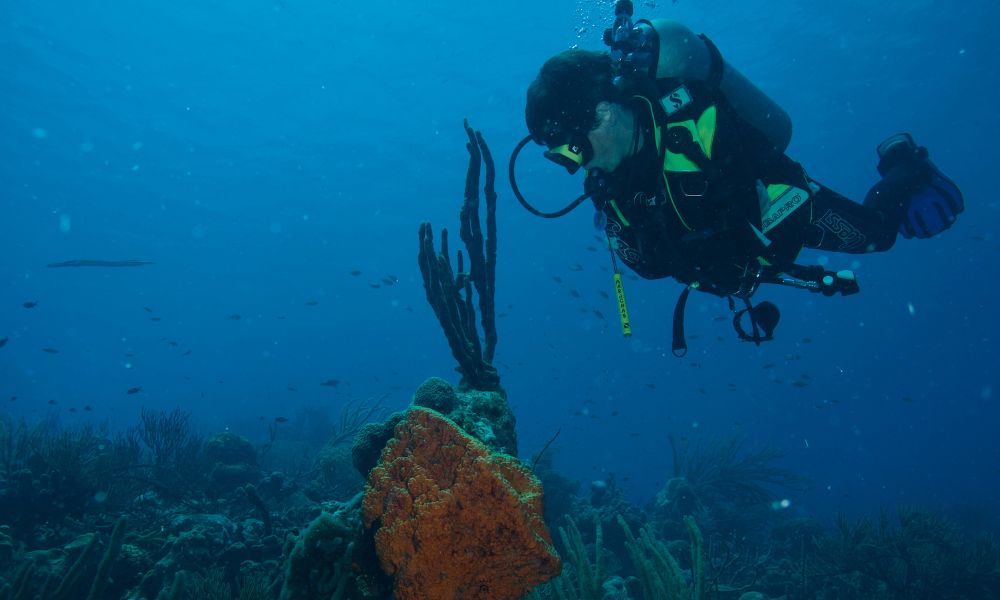
Approaching the Bottom
As the bottom comes into view, start adding a little more air to the BCD. You want to arrive neutrally buoyant — not crashing in, not hovering a metre above and kicking up silt.
Here’s the technique: take a deep breath in and wait. You’ll feel yourself slow, then rise slightly. Breathe out. You’ll settle. That’s neutral buoyancy. That’s where you want to be for the rest of the dive.
From there, check your buddy, confirm your depth, and start exploring.
Wetsuit Compression — The Thing That Catches New Divers Off Guard
Around 5–8 metres, something changes. Your wetsuit starts to compress under the increasing pressure, and the buoyancy it was providing starts to disappear.
You’ll notice yourself becoming heavier. This is normal — but if you’re not ready for it, you’ll start sinking faster than intended.
The fix is straightforward: as you start descending, start adding small bursts of air to your BCD. Not a long hold — short taps.
You’re compensating for what the wetsuit is losing, not trying to slow yourself with the BCD alone.
If you want to master your buoyancy, check out our Mastering Scuba Diving Buoyancy lesson.
What To Do If Your Descent Goes Wrong
Equalisation Problems
If you or your buddy can’t equalise, stop immediately. Rise half a metre to a metre and hold. Continue trying to equalise gently. Never force it — if it won’t clear at that depth, go up slightly more and give it a minute.
If after a while it still does not, calling the dive is the right call. Safe your ears for another day.
PRO TIP: If you’re with a larger group and the group is continuing down, don’t panic. You can stay above them for several minutes while you work through it. What you can’t do is lose track of where they are.
Keep a visual at all times, go into a horizontal position (to avoid current to sweep you away) and kick to keep up.
You might have to work slightly harder, as currents are stronger above then at the bottom.
Uncontrolled Descent
You’re sinking faster than you want to and it’s accelerating.
Here’s what I would do:
First, kick. Use your fins to slow or stop the descent. Get yourself stationary — finning against gravity in a vertical position.
Once you’ve stopped or slowed significantly, then start adding air to your BCD. Don’t reach for the BCD while you’re still dropping fast; get stable first.
Once you’ve found neutral buoyancy at that depth, you’ll likely be deeper than you planned.
That’s okay. Make your way back up using gentle kicks or breathing control, remembering to release air from your BCD as you ascend — the air you added at depth will expand as you rise.
Use a reference whenever possible.
Shore diving? Practice on the slope where you have the bottom as a visual. Drift diving? The dive guide’s line is your friend — grip it. It won’t stop your descent, but it gives you a reference point that makes everything easier to manage.
The Controlled Ascent — Step by Step
Initiate Correctly
Two things trigger an ascent: you’re low on air, or you’ve hit your planned turn point. Either way, your first job is communication.
Signal your buddy — thumb up, clear and deliberate. Wait for their response. If you’re with a guide, tell them too. Don’t just start drifting upward.
Then find a reference. Wall dive? Use the wall. Line available? Use it. Open water with no visual reference? That’s what your dive computer is for — watch your depth and ascent rate.
If you are looking for some dive computer recommendations, be sure to check out The Ultimate Guide to Choosing Your First Dive Computer
Going Up in Stages
Mirror what you did on the way down. Ascend 5 metres, stop, check.
At each pause: look at your buddy, check your depth, check your ascent rate, and test your buoyancy.
Here’s how I test it — breathe out fully and wait 1–2 seconds. If you drift down slightly, you’re neutral at that depth. Good — keep going.
If you don’t move or you continue to rise after exhaling, vent a small amount of air from your BCD before continuing.
Have your deflator in your hand the entire ascent. Not because you’ll be constantly hitting it — but because when you need it, you need it immediately.
The Critical Zone: Final 6 Metres
The last 6 metres to the surface is where pressure changes fastest and where most uncontrolled ascents happen. Be extra slow here.
The air in your BCD is expanding most rapidly, and if you’re not actively managing it, you’ll accelerate.
Hold your deflator ready. Breathe slow and steady. Never hold your breath — the expanding gas in your lungs needs to go somewhere, and if you hold it in, you’re risking a pulmonary barotrauma.
Ascent Rate
The current widely accepted safe recreational ascent rate is 9 metres (30 feet) per minute. The old standard was 18 metres/minute — that’s been superseded by research showing higher bubble grades at faster rates.
The easiest way to stay honest about this: never rise faster than your own smallest bubbles.
Safety Stop at 5 Metres
Do your safety stop at 5 metres for a minimum of 3 minutes on any dive deeper than 10 metres. This isn’t optional on recreational dives, and it’s not just procedure — it’s the body flushing out dissolved nitrogen before you surface.
Hold your depth with a reference if you have one. Wall, line, slope — use it. If you’re in open water, it’s harder. Your dive computer is your depth gauge. Watch it.
What To Do If Your Ascent Goes Wrong
Uncontrolled Ascent (Shooting Up)
This is the scenario that makes instructors nervous, because the instinct is wrong. Most divers who feel themselves rising uncontrollably arch their back and push their upper body down — which does almost nothing useful.
What actually works: turn upside down and kick down.
I know it sounds counterintuitive. But it works. Kick yourself down 2–3 metres while simultaneously reaching for your dump valve on the back to release air.
Once you’ve slowed and dumped the air, get horizontal, find neutral, and reset your breathing. Then begin your ascent again — properly this time.
If you’re close to the surface and don’t have depth to play with, grab your buddy or dive guide’s hand. Any anchor is better than continuing to rise.
If You've Surfaced Without a Safety Stop
First, don’t panic. The no-decompression limits exist for emergency situations like this — staying within your dive limits means a missed safety stop is serious but not automatically a DCS event.
If you can get back to 5 metres and have enough air to complete the stop, do it. If you can’t — if you’re low on air, panicked, or unable to descend — inflate your BCD on the surface, take a breath, and stay put.
And then stay out of the water for at least 24 hours. Monitor yourself for DCS symptoms: joint pain, skin mottling, difficulty breathing, neurological changes. If anything feels off, get to a hyperbaric facility or call DAN (Divers Alert Network) immediately.
Frequently Asked Questions about Scuba diving ascents and descents
How fast should you descend when scuba diving?
There’s no hard speed limit for descent the way there is for ascent, but the practical governor is your ability to equalise. If you’re descending faster than you can comfortably clear your ears, you’re going too fast. In practice, most controlled descents happen at 15–30 metres per minute — slow enough to equalise every couple of metres and stop if needed. The real problem isn’t the speed itself; it’s losing control of the speed. An uncontrolled descent accelerates as your wetsuit compresses and you get heavier, which is why you need to start compensating with BCD air before you feel like you need to.
What is the safe ascent rate for scuba diving?
The current standard across most training agencies is no faster than 9 metres (30 feet) per minute. This replaced the older 60 feet per minute guideline after research showed significantly higher nitrogen bubble grades at the faster rate.
The easiest field guide: never ascend faster than your own smallest bubbles. Your dive computer will also alert you if you exceed a safe rate — another good reason to always dive with one.
What happens if you ascend too fast in scuba diving?
If you ascend too quickly, nitrogen that dissolved into your blood and tissues under pressure doesn’t have time to off-gas safely. Instead of being exhaled normally, it forms bubbles — that’s decompression sickness (DCS).
Symptoms can range from joint pain and skin rashes to neurological problems and, in severe cases, paralysis. Fast ascents also risk pulmonary barotrauma: the air in your lungs expands faster than it can exit, which can rupture lung tissue and cause arterial gas embolism. Both conditions can be fatal.
This is why the safety stop at 5 metres matters, and why ascent rate isn’t optional.
What should I do if I can't equalise on descent?
Stop descending immediately. Rise 0.5 to 1 metre and hold that depth.
Continue trying to equalise gently — swallowing, jaw movement, the Valsalva technique (pinching your nose and blowing gently).
Never force equalisation or push through ear pain.
A blocked ear that becomes a ruptured eardrum can keep you out of the water for months and cause permanent hearing damage.
No dive is worth that.
PRO TIP: Go up 2m, do not try equalize again. Give your ears to naturally adjust – in those 2 minutes focus on maintaining depth, staying with the group (above them) and then try again. Repeat the process. Do not blow on it like you are trying to inflate a baloon!