Do not make the same mistakes I did when buying your first Scuba Diving Equipment.
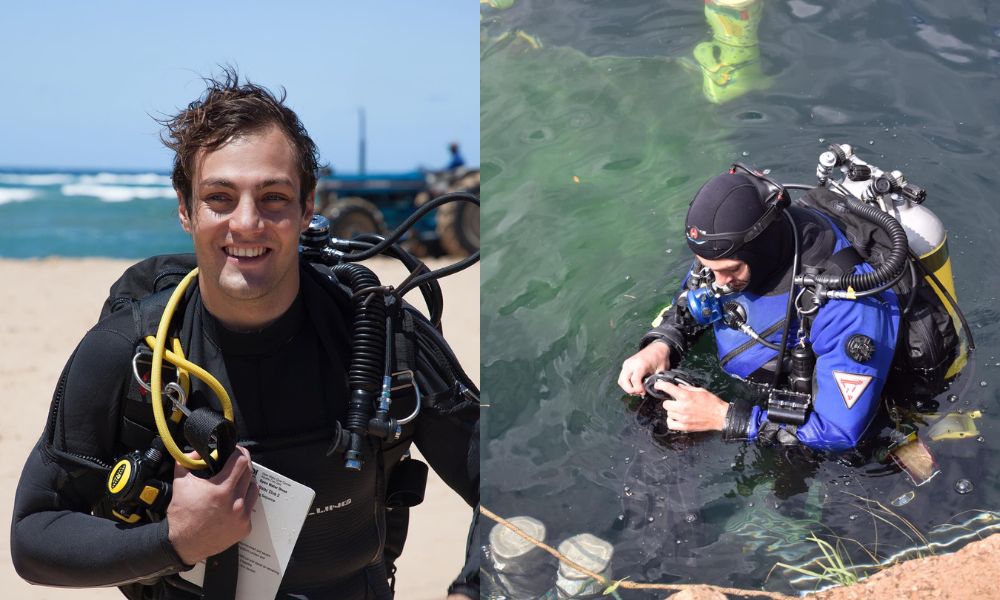
My first BCD was a Mares Dragon and the first piece of scuba equipment I owned.
Big, bulky, side-inflation jacket — the kind most dive schools use for training because the supplier deals are good, it’s practically indestructible, and it handles years of student abuse without complaint. I saved up, bought it, and felt like I was finally a proper diver with my own kit.
Then I started teaching. And the more I taught, the more I realised something uncomfortable: the gear I’d bought was working against me. The jacket pushed me into a head-up, feet-down position underwater. My trim was off. My buoyancy was harder to control than it needed to be. I wasn’t managing the gear — the gear was managing me.
A few years later I made the switch to a backplate and harness. I remember thinking: why didn’t anyone just tell me this from the start?
I’ve watched this exact same story play out with hundreds of beginner divers since then. Scuba gear for beginners should be chosen deliberately — but most people finish their Open Water course having dived on one set of gear, leave the dive shop thinking that’s basically all that exists, and buy what feels familiar. Two years later, when their diving has evolved, they’re buying again.
That’s what this guide is about. Not just what scuba diving equipment to buy — but how to think about buying it, in the right order, for the type of diver you’re actually going to become.
The Core Principle: Where to Spend, Where to Save on Scuba Equipment
Before going through each piece of scuba diving equipment: buy quality on anything that controls your safety and breathing underwater; be more considered on everything else.
Your regulator keeps you breathing. Your BCD controls your buoyancy and emergency inflation. Your dive computer manages your decompression profile. These are the three pieces where cutting costs creates real consequences — not just inconvenience, but safety risk.
Your mask, wetsuit, and fins matter too, but a quality mid-range option in each category will perform comparably to the top of the range for most recreational diving. Where those items get more nuanced — and they do — I’ll cover that below.
The BCD: The Most Expensive Mistake New Divers Make
Here’s what happens in most dive schools: the scuba diving equipment you train on is a jacket-style BCD. Side inflation, hugs your torso in a horseshoe shape, very supportive on the surface. It’s everywhere because operators buy in bulk, the supplier deals are excellent, and they last for years of student use.
That’s fine for training. The problem comes when students leave their course, go to a dive shop, and buy one — because it’s all they’ve ever used. I did exactly this. The Mares Dragon I bought was exactly that kind of BCD. And as soon as I needed my gear to actually help me dive well — to hold trim, to stay horizontal, to stop fighting my position in the water — I understood the limitation.
Jacket BCDs push you into a head-up position underwater.
The inflation is around your sides and torso, which tips your feet down. As scuba gear for beginners goes, it’s forgiving on the surface — but in gentle diving conditions underwater, you may not yet notice the limitation. For drift diving, wreck diving, or any time you need real horizontal trim, you’ll feel it constantly.
The alternative is a backplate and wing.
A metal or carbon fibre backplate, a harness, and an inflatable bladder behind the tank rather than around it. It looks more technical. Most dive shops don’t push it to new divers because it’s harder to sell to someone who hasn’t yet understood why it’s better.
But here’s what you actually get:
Horizontal trim.
Because the inflation is behind you, your body naturally settles into a horizontal position. You stop fighting your buoyancy and start managing it. This is the single biggest change most divers feel when they make the switch.
Modularity.
The backplate stays. You swap the bladder depending on what you’re doing — single tank, twin set, different environments. I’m still using the same Apeks steel backplate and harness I bought seven years ago for both setups.
A path into deeper, more technical diving.
The D-rings on a backplate harness let you clip torches, stage bottles, or a second cylinder. If your diving ever evolves — and for a lot of people it does — you’re not starting over. You’re building on what you already have.
If you’re budget-constrained right now and don’t think you will ever dive technical or deep, then look at a back inflation BCD if you are struggling with trim.
One variable worth thinking about before you buy: how much are you going to travel?
A steel backplate weighs around 2kg. Add a stainless harness and a bladder and you have a heavy, bulky piece of kit that eats into airline luggage allowances fast. If you're planning regular dive travel, a lightweight aluminium or carbon fibre backplate — or a purpose-built travel BCD — is worth considering from the start. They sacrifice a little rigidity, but they're a fraction of the weight and pack far more easily. I've seen divers lug steel backplates to liveaboards and spend every trip battling excess baggage fees. Know your dive life before you buy your dive kit.
BCD Budget Estimates:
Regulators: No Compromise, No Exceptions
This is the one non-negotiable. Your regulator is breathing apparatus. At 20 metres, if it underperforms in a high-demand situation, the consequences are immediate.
Balanced versus unbalanced — and why it matters at depth.
Most rental regulators — including the quality brand ones you’ll find at schools — are unbalanced. That works fine for shallow training dives. But an unbalanced regulator doesn’t adjust properly to ambient pressure as you go deeper. I won’t take an unbalanced regulator below 20 metres. In a calm, controlled environment it’ll function. In a stressful situation where you need real airflow demand, it can’t deliver the way a balanced regulator can. Buy balanced from the start.
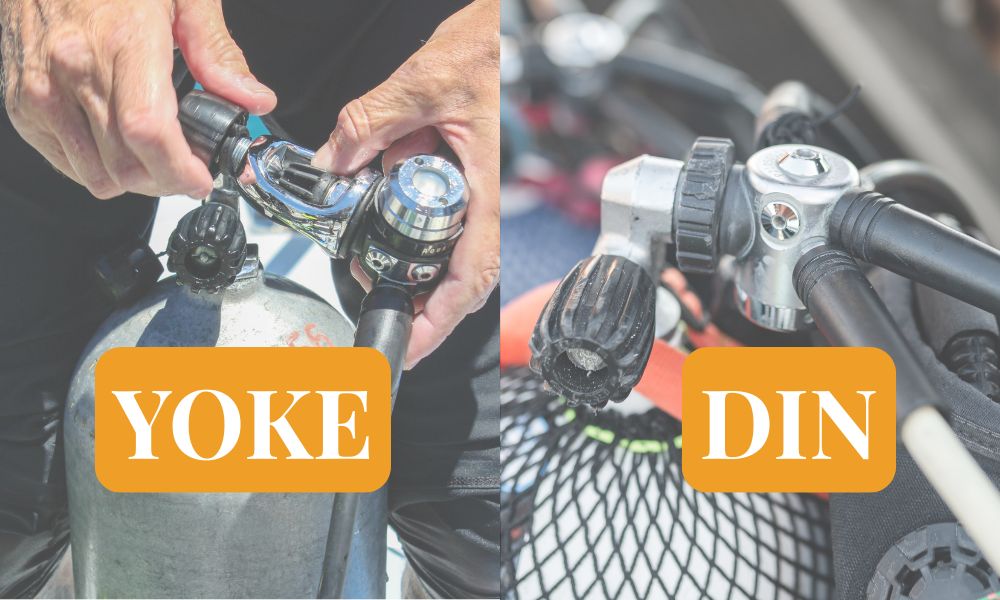
DIN versus yoke.
Yoke (A-clamp) is the global standard you’ll encounter everywhere. DIN screws directly into the tank valve. I’ve been diving DIN exclusively for years — I’ve watched yoke O-rings fail on boats and underwater more times than I care to remember. Not catastrophically every time, but enough leaks and burst connections that I simply won’t go back. DIN is more secure, almost maintenance-free on the connection side, and is what technical diving runs on. If you’re not sure what tanks you’ll encounter when travelling, a DIN regulator with a YOKE adapter covers both.
DIN with a yoke adapter is the easy win here.
What Scuba Equipment I actually dive on:
I’ve been using the same Aqualung Legend first stage for eight years. I bought it once. It’s been serviced annually, every year, without exception — and annual servicing is not optional. Salt and corrosion, if left unattended, will block a regulator fast. The service cost is €60–100 per year. Over eight years, that regulator has cost me a fraction of what two cheap replacements would have.
That’s the real economic argument for quality: not the purchase price, but the whole-of-life cost. A quality regulator from a reputable manufacturer — Aqualung, Apeks, Scubapro (my top recommendations) — will serve you for 15 years with proper care.
Regulator Budgets:
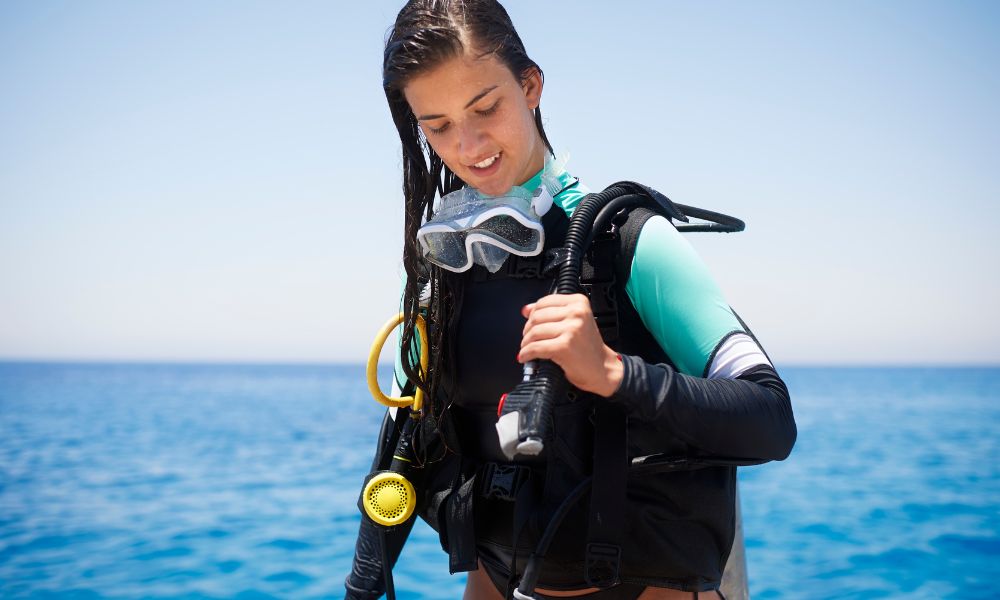
The Mask: Fit Beats Brand, Buy Two
The most expensive mask in the display case is worthless if it doesn’t seal on your face. I’ve seen students rush this stage because they want something that looks good — and I get it. But underwater, no one’s admiring your mask. What matters is whether it leaks.
The fit test is simple.
Place the mask against your face without using the strap. Inhale gently through your nose. If it holds suction without you holding it — it fits. If it falls off, move to the next one. That’s the entire test.
Low-volume masks are preferable for most divers: easier to clear, easier to equalise, better peripheral vision than the wide-frame options.
Here’s the advice I give every student after they find a mask that fits after testing on a few dives: get the brand and model, and buy two. One for diving, one as a backup.
A mask that fits your face is genuinely hard to replace — manufacturers discontinue models, the silicone changes slightly between production runs, and tracking down the same mask two years later can be frustrating. If you found one that works, protect that.
New mask preparation:
New masks fog because of a silicone film from manufacturing. Remove it before your first dive. Apply toothpaste firmly to the inside of the lens, leave for 10 minutes, rinse thoroughly. Repeat two or three times. Here is the full defogging mask guide
Mask Budgets:
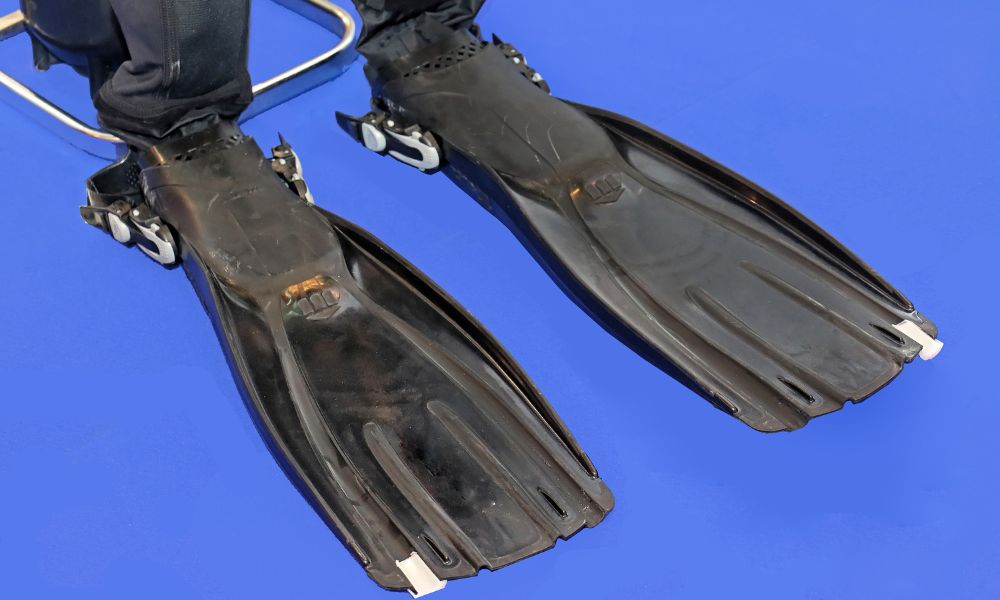
Fins: More Important Than You Think, But Consider Buying Them Last
Most gear guides rank fins near the bottom of the priority list. I used to think the same — until I realised that fins don’t just propel you through the water. They’re a buoyancy variable.
Fins have weight.
That weight either works for you or against you depending on your setup. Super lightweight fins will let your feet float — which sounds fine until you’re trying to hold horizontal trim and your legs keep rising. Heavier fins pull your feet down and actively contribute to a flat body position.
I run two sets: a lighter pair for my backplate setup in warm water, and Apeks RK3s — heavy, powerful fins — for when I’m in my drysuit and need that foot-down balance restored.
Your BCD and your fins need to match – The second reason fins matter more than people say:
This is the insight I’ve seen cost divers money over and over. The way your body sits in the water depends on your BCD. The fins you need to complement that position depend on your BCD. Change one, and you may need to change the other.
If you buy fins to match a jacket BCD and then switch to a backplate, your trim changes — and suddenly the fins that worked before aren’t working anymore. It’s not a fault with the fins. It’s that the system changed. I went through this myself.
My wife went through it when she made the switch to a more technical setup. The fins that were sold to her for one style of diving simply didn’t work for the other. She had to rebuy.
The fin style question:
blade fins are the default for most recreational diving and they work with the widest range of techniques — flutter kick, frog kick, back kick, helicopter turn.
Split fins divide opinion; they reduce drag for flutter kick but lose power on frog kick, which is the reef-friendly standard most instructors teach. Get your technique sorted, then revisit.
The practical implication for buy order:
get your BCD sorted first. Once you know how your body sits in the water, buy fins to complement that position. This is why fins come last in my recommended sequence.
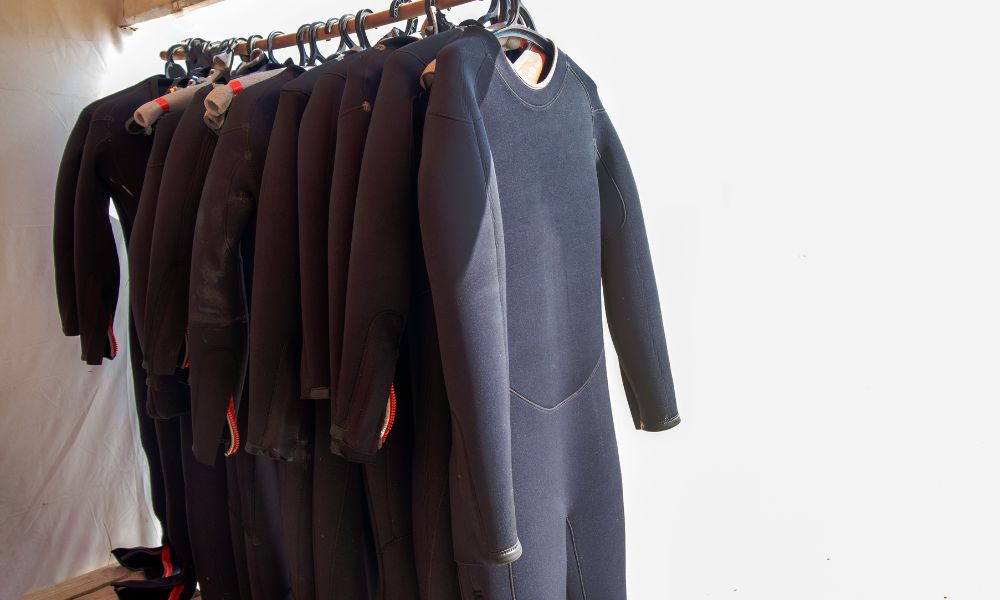
Wetsuit: Fit First, Then Thickness
The standard chart — 3mm for 27°C+, 5mm for 22–26°C, 7mm below 22°C — is a reasonable starting point. What it doesn’t tell you is that fit matters more than thickness.
A wetsuit works by trapping a thin layer of water against your body and warming it. If the suit is loose, that water flushes through and you get cold quickly. A well-fitted 3mm will keep you warmer than a baggy 5mm.
Buy a wetsuit that fits snugly and allows full range of movement: arms raised fully overhead, bend at the waist, squat without the suit pulling. If any of those positions are restricted, the suit is too small.
On thickness and exposure:
for regularly cold divers, or anyone diving consistently below 22°C, a semi-dry suit is the next step before committing to a full drysuit. Shorties (short arms and legs) are appropriate above 28°C where stings and abrasions are the concern, not thermal protection.
Dive Computer: The One Scuba Gear You Should Own From the Start
Rental computers have unknown service histories, possibly depleted batteries, and settings you didn’t configure. Your dive computer is managing your decompression profile. That is not a device to rent long-term.
My personal recommendation:
invest in a computer that can handle multiple gas mixes from the start. This sounds like overkill when you’re doing your first open water dives — but if you ever move into nitrox, sidemount, or technical diving, a multi-gas computer grows with you.
I dive a Shearwater Perdix, which handles everything from recreational to full technical. It’s an investment, and it’s the best dive computer I’ve ever used.
For recreational diving without the technical budget: choose a computer with a clear, readable display, intuitive NDL (no-decompression limit) readout, and a brand with strong after-sales support.
What you’re looking for is a device you can trust and read underwater without having to think about it.
→ If you have a computer, remember to add it into your Pre Dive Safety Checks to switch gasses etc.
The Try-Before-You-Buy Rule (And Why Dive Shops Won’t Suggest It)
Here’s something most dive shops won’t tell you: you should try multiple setups before committing to any scuba diving equipment purchase. Book a pool session with an operator that carries a range of gear. Try a jacket BCD and a backplate. Try different fin styles. Try different wetsuit fits. Do a buoyancy workshop if one is available.
Some operators are very motivated to sell you specific brands — because they have supplier partnerships and margin targets. That’s not a criticism, it’s just how retail works. Be aware of it. The person telling you that a particular BCD is the obvious choice may be the person who has 20 of them in stock.
The other thing to think about before you buy Scuba Equipment: where is your diving going?
If you’re planning to travel light, a 2kg steel backplate may not be the right call — there are aluminium and carbon options that pack more easily. If you want to eventually do technical diving, a backplate with D-rings and a twin-set compatible bladder is the investment that keeps paying. If you’re purely recreational and warm-water focused, a quality jacket BCD and a simple setup may genuinely be the right answer.
Buy for the diver you’re planning to become in two or three years — not just the diver you are after your first certification.
What Scuba Equipment To Rent (And Not Feel Bad About)
Tanks and weights — always rented. No reason to own these. Tanks are heavy, regulated for transport, and fill infrastructure exists at every dive operation.
Torches — rent for occasional use. Regular night or cave diving changes the calculation.
Underwater cameras — rent or borrow until your buoyancy is good enough that you’re not a reef hazard while operating one.
Wetsuit — rent until you know your regular diving environments and temperature preferences. Then buy.
BCD and fins — rent and try different setups before buying. The cost of a couple of guided dives trying different configurations is much lower than the cost of buying the wrong thing twice.
The Recommended Buy Order for New Divers
Most scuba diving equipment guides recommend buying everything at once. This sequence is different — and here’s why it matters:
- Mask — fits your face, not someone else’s. Hygiene. Non-negotiable to rent long-term.
- Dive computer — own your decompression management from the start.
- Regulator — once you’re diving regularly, stop renting the thing you breathe through.
- BCD — but only after you’ve tried multiple styles. Take your time on this one.
- Fins — last, because fins are chosen to complement your BCD and your body position. Get the BCD right first, then buy fins that match it.
The most common mistake with scuba gear for beginners is buying all of it at once before completing an Open Water course — almost certainly too much, too soon, in the wrong configuration.
Frequently Asked Questions
Do I need to buy my own scuba gear to start diving?
No. When it comes to scuba gear for beginners, rental equipment at virtually every dive centre globally is perfectly adequate for getting started. The case for owning grows as you dive more frequently — familiarity with your equipment, known service history, better hygiene on items like masks and regulators.
Start renting, try different setups, then buy once you know what you actually want.
How much does a full set of scuba diving equipment cost?
A complete recreational scuba diving equipment setup — BCD, regulator, wetsuit, mask, fins, computer — runs approximately €1,200–2,000 for quality mid-range gear. The regulator and BCD are not the places to compromise on cost. Everything else has more room for a mid-range choice.
Is a backplate and wing better than a jacket BCD?
For most intermediate to experienced recreational divers, yes — better trim, more modularity, longer lifespan. I made the switch years ago and haven’t looked back. For beginners still developing buoyancy skills on the surface, a jacket BCD is slightly more forgiving.
The more important question is: where is your diving going? Buy for that diver, not just the one you are today.
Should I buy scuba gear before or after my Open Water course?
After — and ideally after a few more dives than just your certification. The best scuba gear for beginners is gear bought with context, not gear bought on day one. Your Open Water course is done on the school’s equipment, which may not represent all the options available to you. Try a few different setups before committing.
The mask is the only item I’d suggest buying during the course once you found one that fits well
What's the most important piece of gear to own?
Your dive computer — because it manages your decompression profile and you need to know its history and settings. Renting a regulator is understandable in the short term.
Renting a computer with an unknown service history and battery level is a risk that isn’t worth taking once you’re diving regularly. → Full guide to dive computers
On most liveaboard trips, they provide you with a list of gear you need to bring and what you can rent, but having a dive computer to track your dive profile throughout is crucial.
What's the difference between a balanced and unbalanced regulator?
A balanced regulator adjusts its performance to ambient pressure as you go deeper, delivering consistent airflow on demand regardless of depth.
An unbalanced regulator doesn’t — it performs adequately at shallow depths but can struggle in high-demand situations at depth. For recreational diving below 20 metres, I only recommend a balanced regulator.
Most rental gear is unbalanced; it’s fine for training, but it’s not what you want to own.